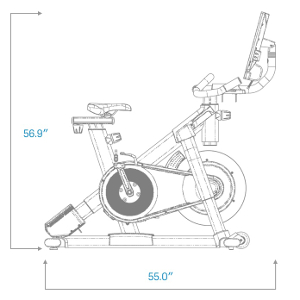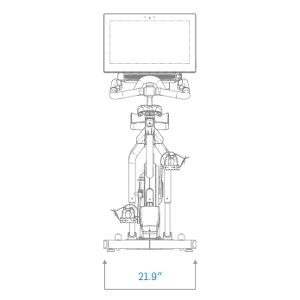
Take advantage of having a personal cycling coach right in your home every day of the week without paying for hefty cycle class prices. The Commercial S22i Studio Cycle challenges you to be the best version of yourself by giving you the tools to help get you there!
Let’s go over S22i bike assembly instructions so your assembly process can run just as smoothly as it was to buy your bike.
S22i Studio Cycle Assembly Instructions
1. Go to my.nordictrack.com on your computer and register your product. Doing so provides you with documents of your ownership, activates your warranty, and ensures priority customer support if assistance is ever needed
NOTE: If you do not have internet access, call NordicTrack Customer Service, which is located on the front cover of your S22i user’s manual and register your product.
2. Once you have two people present for assembly, you can attach the Front Stabilizer to the Base with four M10 x 20mm screws; do not fully tighten the screws yet. Finish attaching the Front Stabilizer with two additional M10 x 20mm screws. Then fully tighten all six M10 x 20mm screws. Press the right Leg Cover downward and attach it to the Base with an M4 x 10mm Screw. Then attach the left Leg Cover in the same way.
3. Attach the Rear Stabilizer to the Base with four M10 x 20mm screws; do not fully tighten the screws yet. Finish attaching the Rear Stabilizer with two additional M10 x 20mm screws. Then fully tighten all six M10 x 20mm screws.
4. Orient the Handlebar Post so that the lower slot is on the side. Next, loosen the indicated Post Knob and insert the Handlebar Post into the Frame until the lower end of the Handlebar Post is below the Frame. Then tighten the Post Knob. Insert the end of the Lower Wire into the Frame and the Handlebar Post and pull it out of the upper slot in the Handlebar Post at the right.
5. Insert the Handlebar into the Handlebar Post. Attach the Handlebar with four M8 x 12mm Patch screws; start all the Patch screws, and then tighten them.
6. TIP: Avoid pinching the wires. Slide the Console Support onto the Handlebar. Attach the Console Support with an M10 x 55mm Bolt and an M10 Locknut; make sure that the Locknut is in the hexagonal hole. Do not fully tighten the Bolt yet.
7. Look under the Console Support and identify the Upper/Yellow Wire, which has a larger connector than the Extension/Red Wire. Connect the Upper/Yellow Wire to the Lower Wire extending from the Handlebar Post. Then insert the connectors on both Wires into the Handlebar Post. Next, connect the Extension/Red Wire to the Control Wire extending from the Handlebar. Then insert the connectors on both Wires into the Handlebar.
8. Have a second person hold the Console near the Console Bracket. Plug the Upper/Yellow Wire and the Extension/Red Wire into the receptacles on the back of the Console; make sure to plug the Wire marked with red into the receptacle marked with red, and plug the Wire marked with yellow into the receptacle marked with yellow.
TIP: Avoid pinching the wires. If necessary, tilt the Console Bracket upward to make this step easier. Attach the Console to the Console Bracket with four M4 x 12mm Machine screws; start all the Machine screws, and then tighten them.
9. IMPORTANT: Have a second person move the Console from side to side, if necessary, so that it is level. While the second person holds the Console still, firmly tighten the M10 x 55mm Bolt. Next, orient the Hand Weight Tray so that the largest opening is facing forward.
TIP: Avoid pinching the wires. Attach the Hand Weight Tray to the Console Support with four #8 x 5/8″ screws; start all the screws, and then tighten them.
10. Orient the Saddle Post. Loosen the indicated Post Knob. Next, insert the Saddle Post into the Frame, and slide the Saddle Post to the desired height. Then tighten the Post Knob.
11. NOTE: You can attach your own saddle, if desired. Tip the Saddle to one side and slide one of the rails as far as possible between the Lower Saddle Clamp and the Upper Saddle Clamp. If necessary, further loosen the M8 Saddle Screw. Tip the Saddle downward and slide the other rail between the Saddle Clamps. Make sure that both rails are in the grooves in the Saddle Clamps and that the Saddle is straight and level. Then firmly tighten the Saddle Screw.
12. NOTE: You can attach your own pedals, if desired. Identify the right Pedal. Using an adjustable wrench or the included tool, firmly tighten the right Pedal clockwise into the Right Crank Arm. Firmly tighten the left Pedal counterclockwise into the Left Crank Arm.
IMPORTANT: You must turn the left Pedal counterclockwise to attach it.
13. Set the two Hand Weights in the Hand Weight Tray.
IMPORTANT: Make sure not to hit the Console with the Hand Weights when you set the Hand Weights in the Hand Weight Tray after each use.
14. After the studio cycle is assembled, inspect it to make sure that it is assembled correctly and that it functions properly. Make sure that all parts are properly tightened before you use the studio cycle. Extra parts may be included. Place a mat beneath the studio cycle to protect the floor.
For a visual explanation for Commercial S22i Studio Cycle assembly, you can watch the video below for detailed instructions:
If you purchased a NordicTrack treadmill, visit our treadmill assembly instructions for NordicTrack commercial treadmills. And for any further questions, feel free to contact us so we can help you in any way!
DISCLAIMER: This blog post is not intended to replace the advice of a medical professional. The above information should not be used to diagnose, treat, or prevent any disease or medical condition. Please consult your doctor before making any changes to your diet, sleep methods, daily activity, or fitness routine. NordicTrack assumes no responsibility for any personal injury or damage sustained by any recommendations, opinions, or advice given in this article. Always follow the safety precautions included in the owner’s manual of your fitness equipment.
Sources:
https://www.nordictrack.com/exercise-bikes/s22i-studio-bike
https://www.youtube.com/watch?v=WQT6_izNxCM
https://www.nordictrack.com/learn/nordictrack-commercial-1750-treadmill-assembly-instructions/


